-
-
Open the Email you sent yourself
-
-
-
Click the Download button in the attachment thumbnail
-
-
-
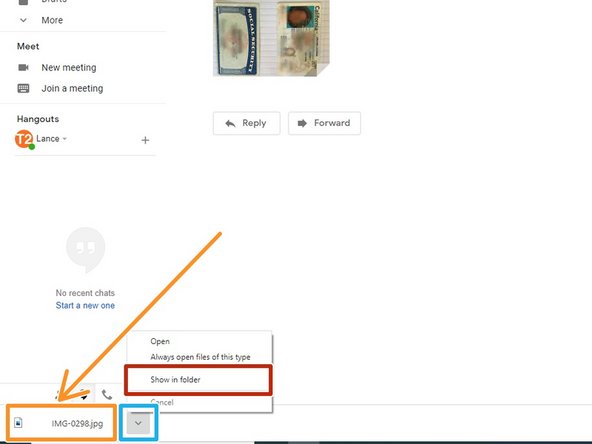
Your Download will appear in the bottom left corner of your browser
-
Once the download has completed:
-
Click the More Options arrow
-
Click Show in folder
-
-
-
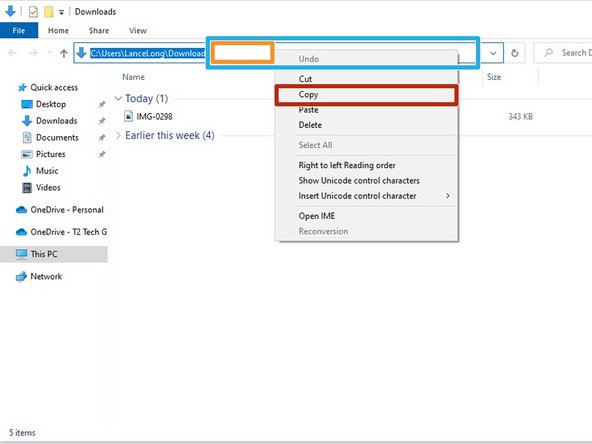
A new File Explorer window will appear showing the file you downloaded.
-
Click once in the Address Field
-
The text in the address bar will be come highlighted.
-
Right-click your mouse in an empty portion of the address bar
-
Click Copy
-
-
-
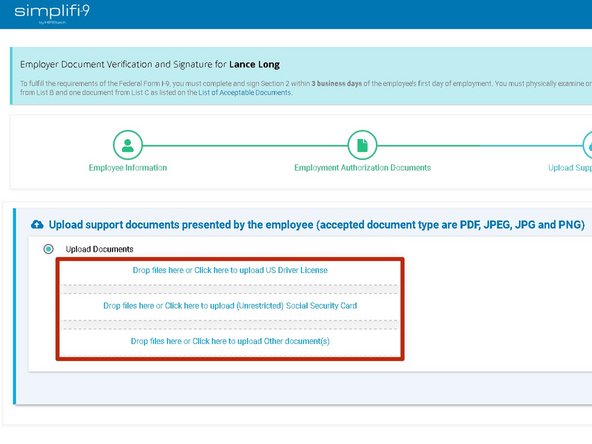
Go back to the Upload support documents page of your I-9.
-
Click the Form of Identification you are uploading
-
-
-
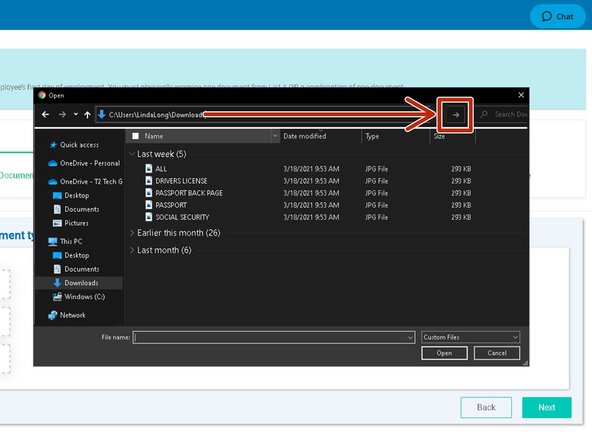
An Open window will appear.
-
Click once in the Address Field
-
The text in the address bar will be highlighted.
-
Right-click your mouse in an empty portion of the address bar
-
Click Paste
-
-
-
The location of your image will appear in the address bar.
-
Click the Enter button in the address bar
-
-
-
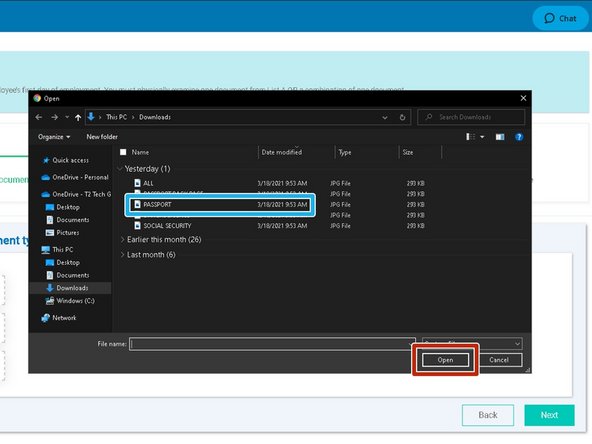
Your image will now appear in the Open window.
-
Click the Image
-
Click Open
-
-
-
Be patient while the image is uploaded. Depending on the speed of your connection, it can take a moment or two.
-
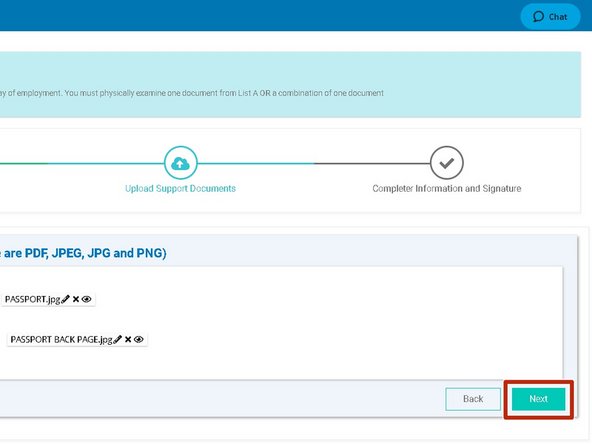
Once the file has been uploaded, you can upload another image, or continue with your I-9.
-
-
-
Click Next to proceed with your I-9
-
-
-
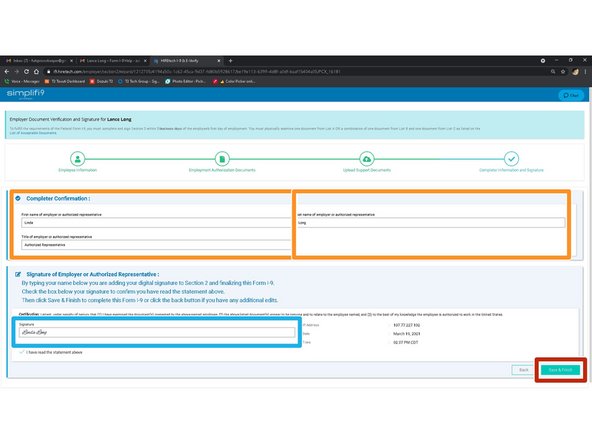
Enter the First name and Last name of the authorized representative
-
Type the authorized representative's name in the Signature field
-
Click Save and Finish
-
-
-
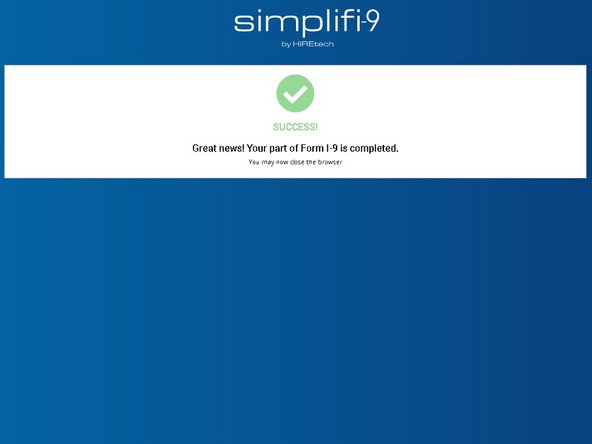
Congratulations, your Federal Form I-9 is complete
-
Almost done!
Finish Line


