-
-
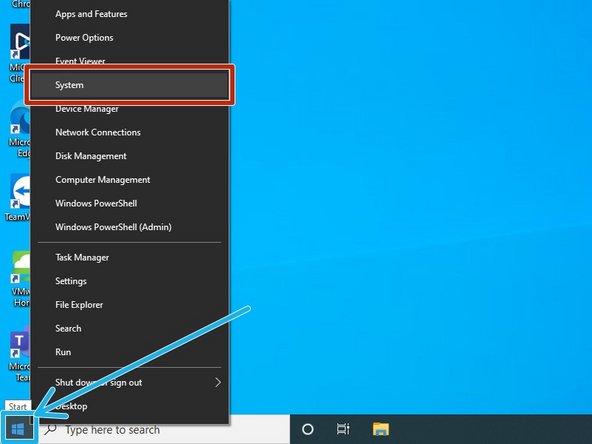
Right-click the Start button in the taskbar
-
Click System
-
-
-
Click Rename this PC
-
-
-
The PC name needs to be changed to your firstname-lastname
-
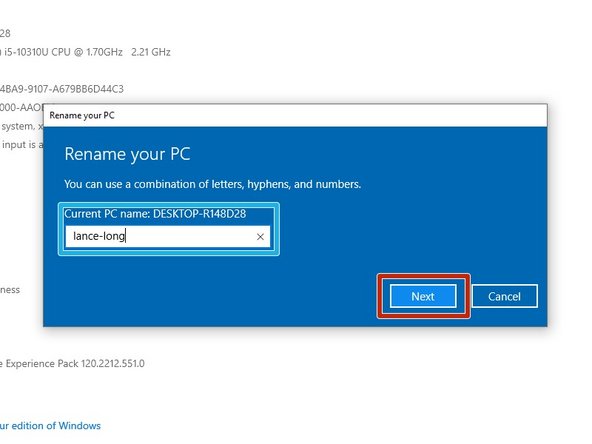
Enter the PC Name
-
Example: lance-long
-
This is just an EXAMPLE, do not rename your PC Lance-Long. Use your own First Name and Last Name. Any machine named Lance-Long will be flagged and removed.
-
Click Next
-
-
-
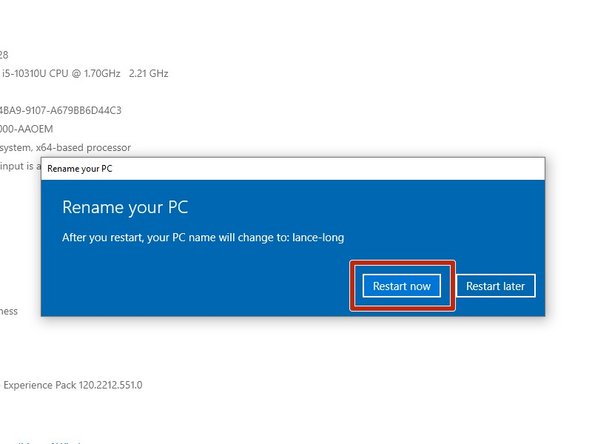
The PC name will be changed once you restart your computer.
-
Click Restart now
-
-
-
Right-click the Start button in the taskbar
-
Click System
-
-
-
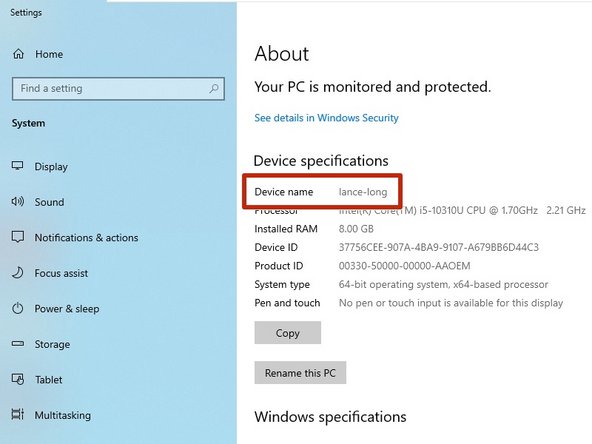
Verify the Device name is your firstname-lastname
-
-
-
If you are using Google Chrome, Skip to STEP 10.
-
-
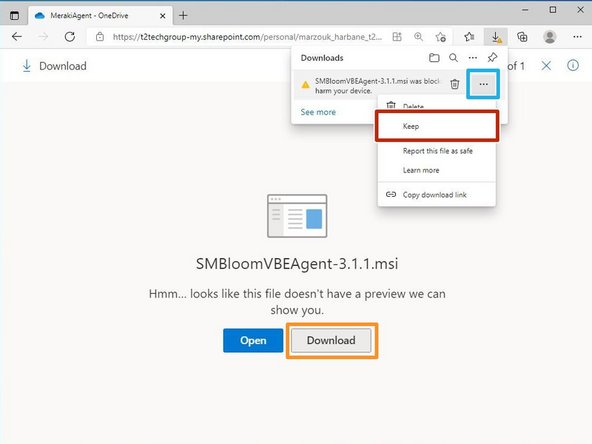
Click Download
-
A new download will begin.
-
Once the download is completed, hover your mouse over SMBloomVBEAgent.
-
Click the ··· (three dots)
-
Click Keep
-
-
-
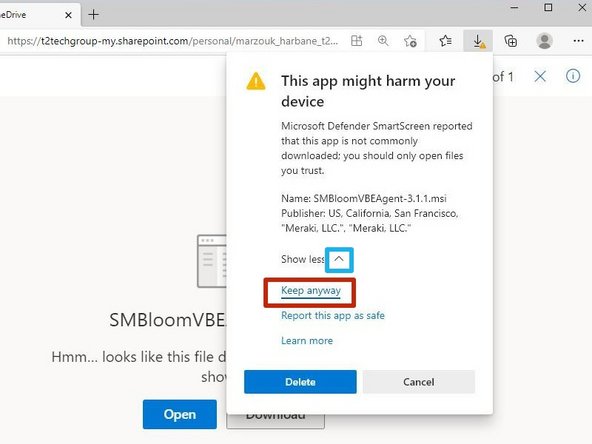
Click the "Show more" arrow
-
Click Keep Anyway
-
-
-
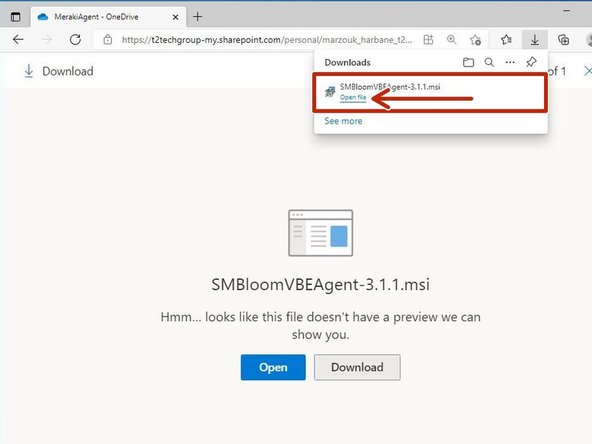
Once the download is complete:
-
Click on Open file for SMBloomVBEAgent
-
Edge users, Skip to STEP 11
-
-
-
If you are using Google Chrome as your web browser:
-
-
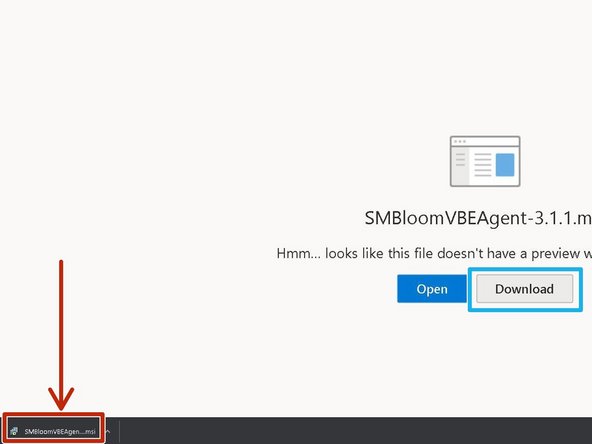
Click Download
-
A new download will begin.
-
Once the download is completed:
-
Click SMBloomVBEAgent
-
-
-
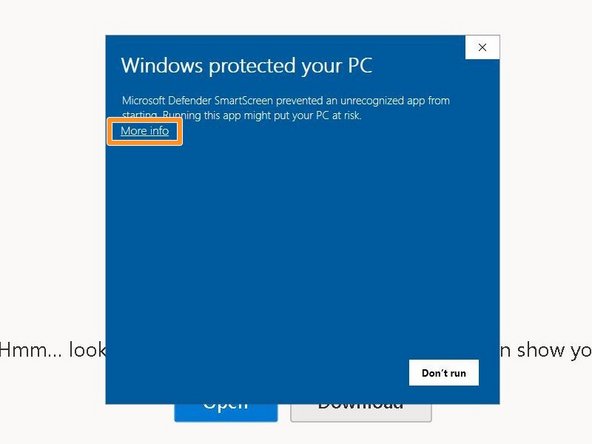
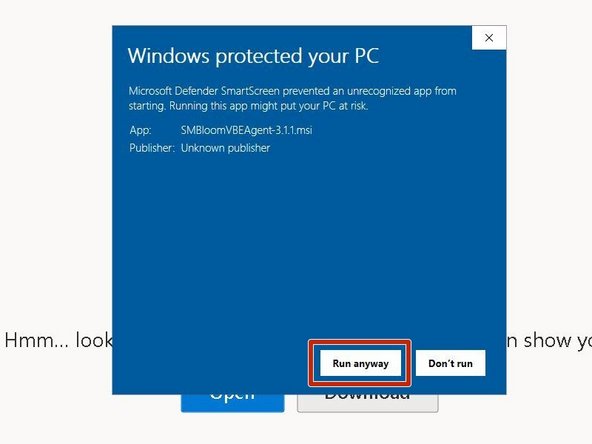
Windows Defender may block the file from opening.
-
Click More info
-
Click Run anyway
-
-
-
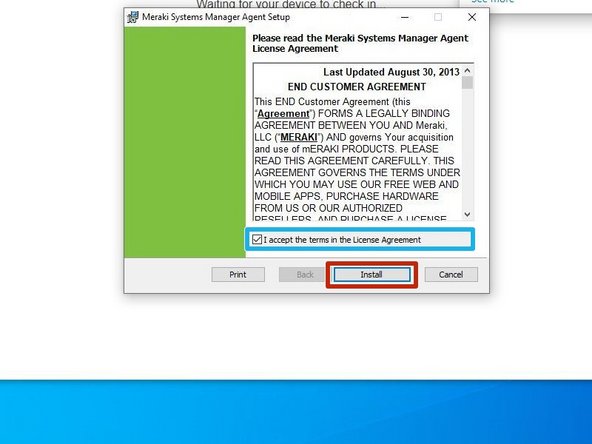
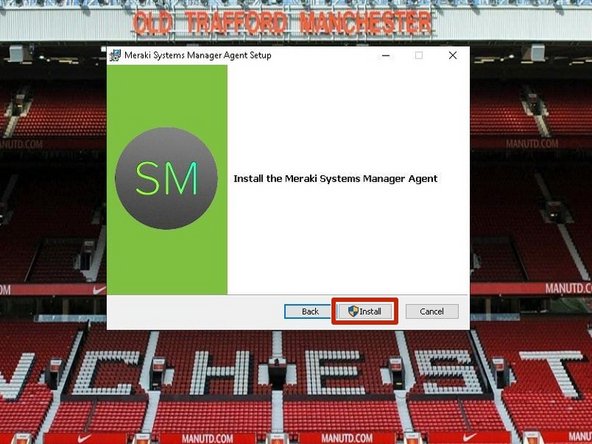
Meraki systems Manager Agent Setup will appear.
-
Review and Accept the terms in the License Agreement
-
Click Install
-
-
-
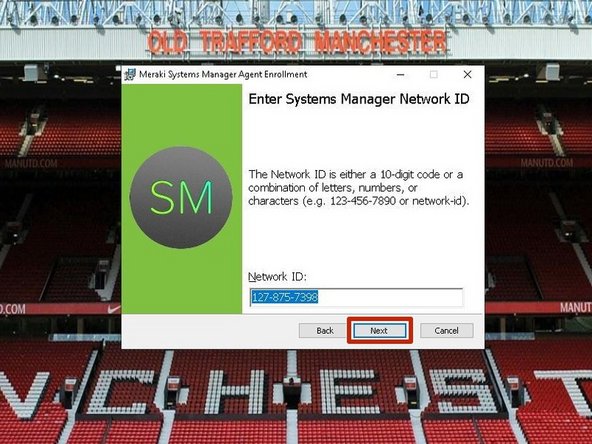
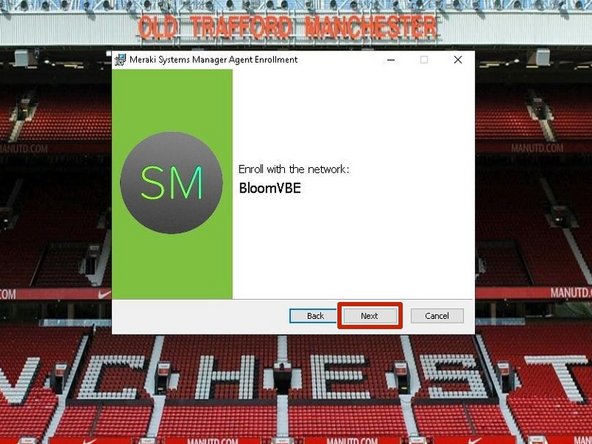
The Network ID does not need to be modified.
-
Click Next
-
-
-
Click Next
-
-
-
Click Install
-
-
-
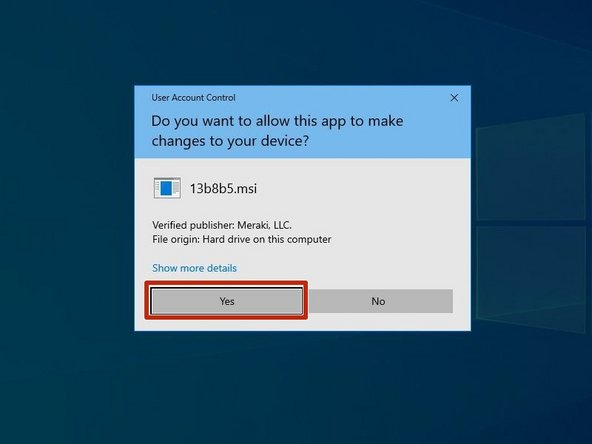
User Account Control may ask for permission to install Meraki.
-
Click Yes
-
-
-
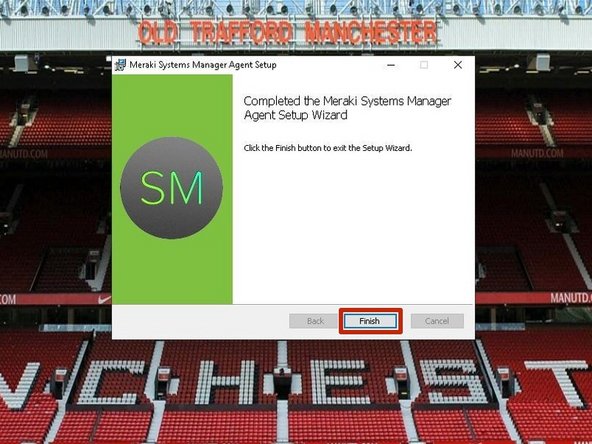
Once the Meraki Setup is complete:
-
Click Finish
-
-
-
To verify Meraki was properly installed:
-
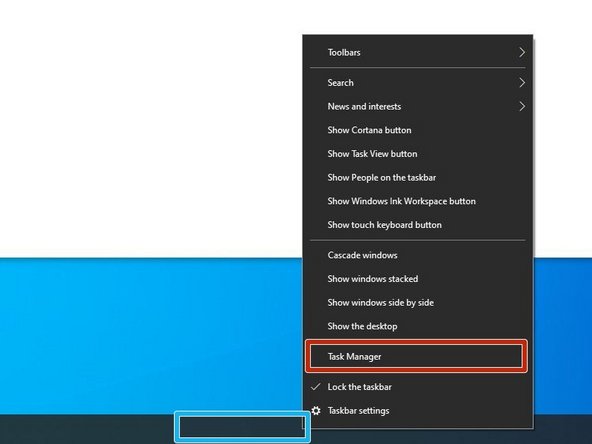
Right-click a blank spot in the Taskbar
-
Click Task Manager
-
-
-
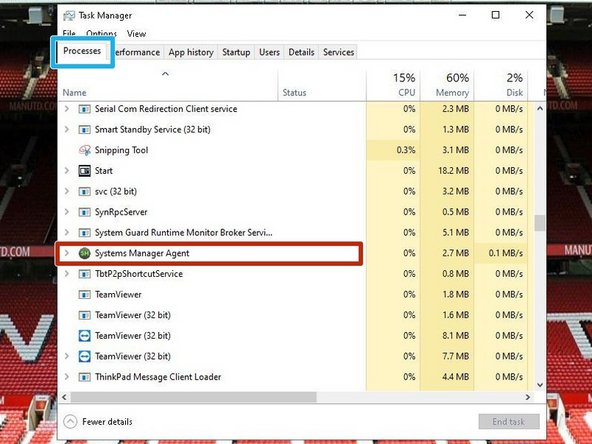
Go to the Processes tab
-
Verify Systems Manager Agent is running
-
If Systems Manager Agent is running, the Meraki Setup is complete.
-
Almost done!
Finish Line


