Introduction
This guide will describe and outline the best practices to effectively lookup patients and create a new chart.
-
-
To search for a patient record:
-
Click Appts
-
-
-
HIPAA validation ensures that we are protecting patient PHI (Protected Health Information) and not accessing an incorrect chart creating a delay in care for the correct patient.
-
You must HIPAA validate the patient on the line. The Full Name PLUS one of the following is required. Validating the customer information will ensure duplicate records are not created. HIPAA validators are:
-
REQUIRED Full name: lance, long
-
Date of Birth: 030487
-
Medical Record Number(MRN): 6391502
-
Last 4 of Social Security Number(SSN): *6694
-
Enter the HIPAA validators
-
Click Find Patient
-
-
-
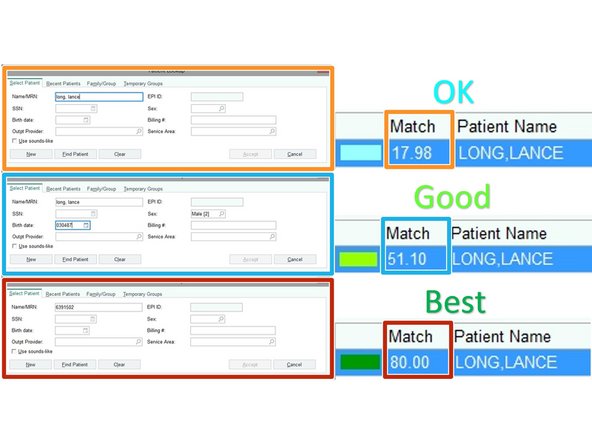
The more information you can include in the search the better. The MRN is the best way to verify a patients record.
-
Minimal Information will have OK Match probability
-
Detailed Information will have Good Match probability
-
The Medical Record Number (MRN) will have the Best Match probability
-
Patients may confuse their MRN with their Insurance ID.
-
For search and HIPAA validation purposes, always try to capture the Full Name and Date of Birth, then rely on the MRN and last 4 of the SSN as backups.
-
-
-
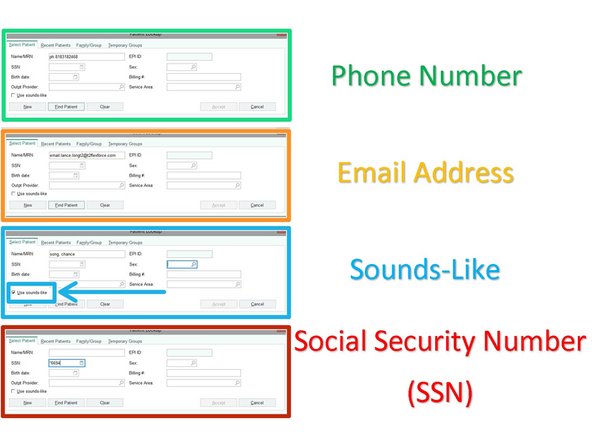
If the patient's chart does not display, you must search for the patient using the following alternative methods:
-
Ask the customer to spell their name
-
Ask about previous names (aka, maiden names, etc.)
-
Ask if they have been seen at any Geisinger facility, such as the ER.
-
Phone Number: ph.8183182468
-
E-Mail Address: email.lance.longt2@t2flexforce.com
-
Sounds-Like: song, chance
-
SSN: *6694
-
-
-
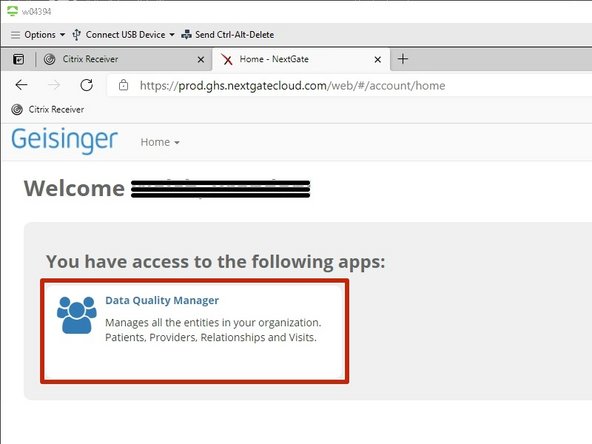
If you are unable to find a patient record you must check Nextgate before creating a new chart:
-
-
NextGate can only be accessed while connected to your Geisinger VPN.
-
-
-
Click Data Quality Manager
-
NextGate can only be accessed while connected to your Geisinger VPN.
-
-
-
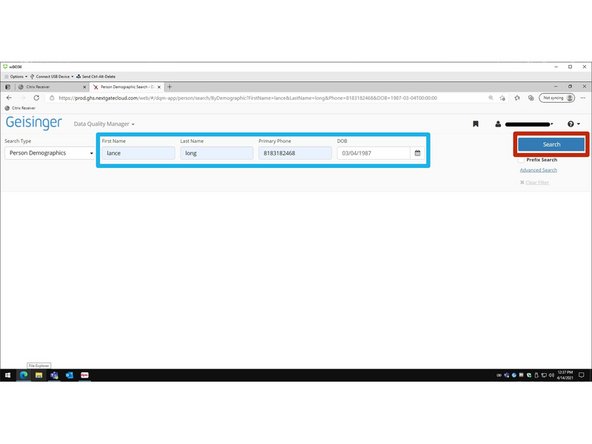
Enter the Person Demographics
-
Click Search
-
-
-
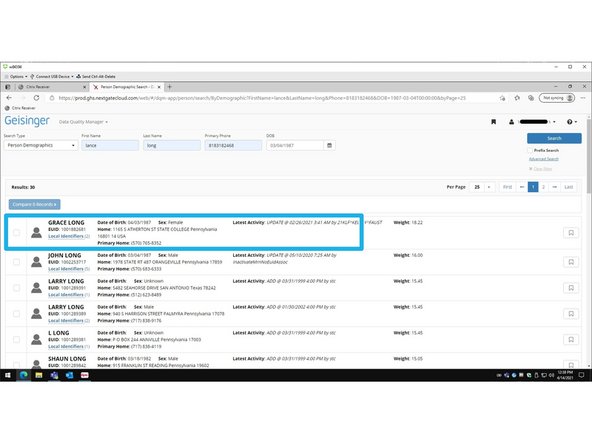
Based on the results, you can ask the patient to confirm any other names (maiden name), old addresses, or alternate phone numbers.
-
Always ask the patient to confirm their information, never provide any patient details over the phone.
-
Double-click a Patient for a detailed view
-
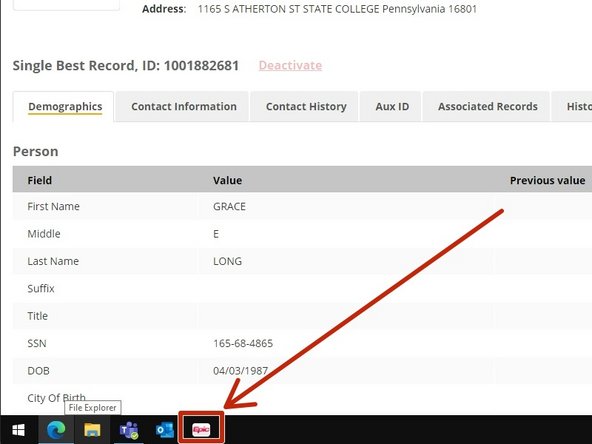
Go back to Epic
-
-
-
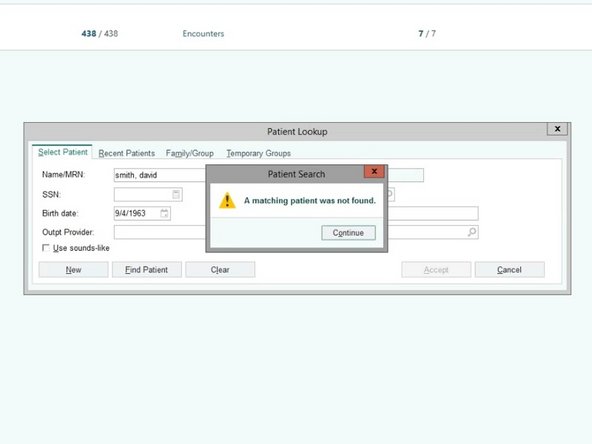
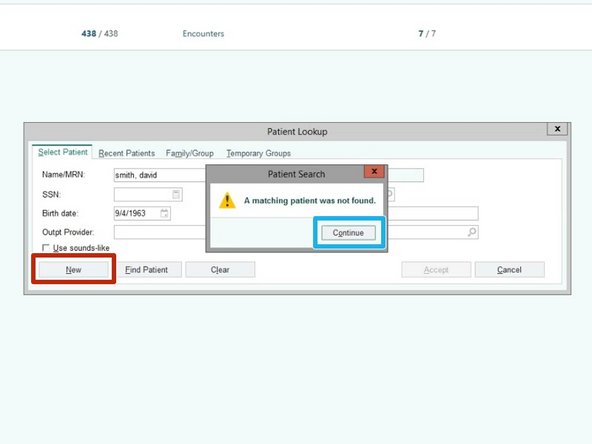
If no patient record exists:
-
Click Continue
-
Click New
-
-
-
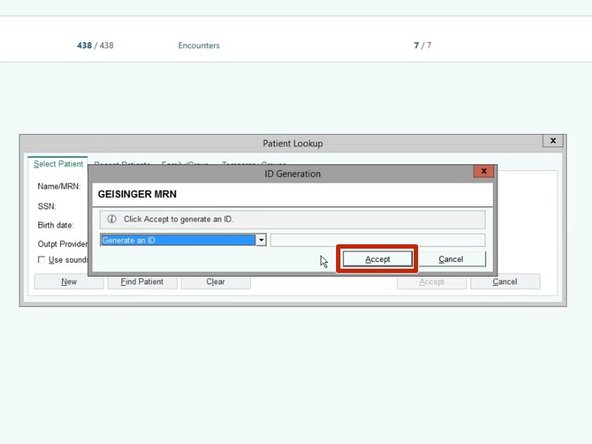
Click Accept
-
-
-
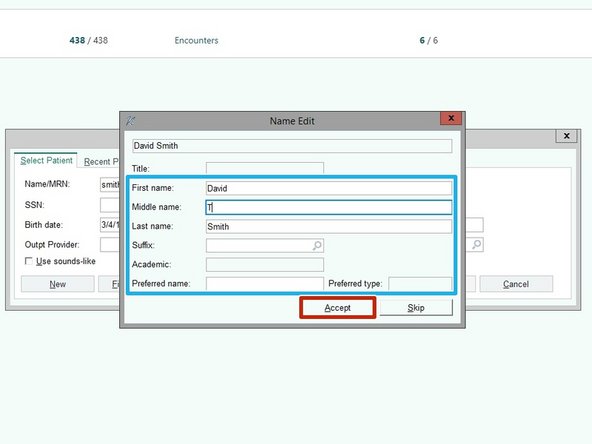
Confirm and add any Additional Name Details
-
Click Accept
-
-
-
Complete the rest of the Patient Demographics.
-
You must obtain as much patient information as you can.
-
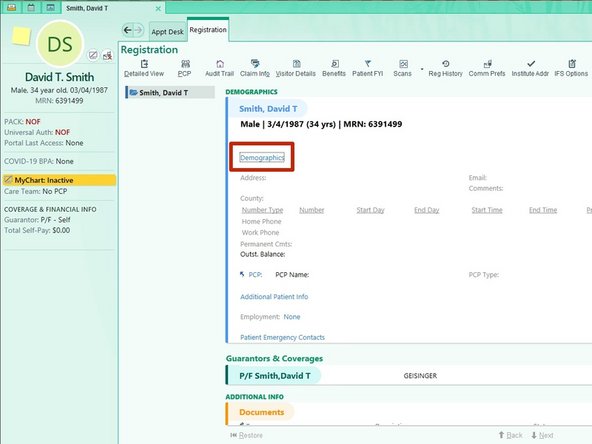
Click Demographics
-
-
-
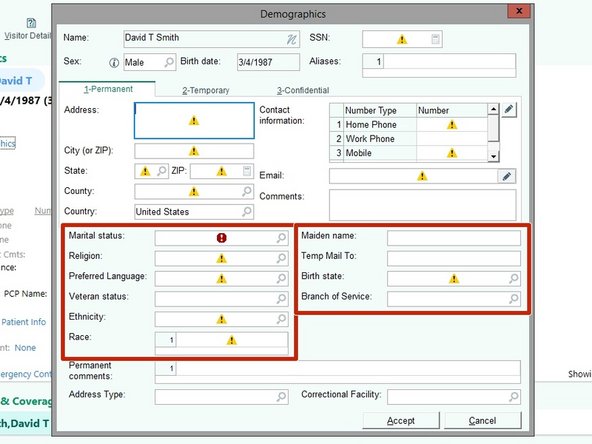
Demographics with a STOP SIGN are required before you can proceed. All others should be obtained if possible.
-
Collect the patient's Marital Status and other background demographics
-
To ensure you can obtain as many details as possible, remember to be courteous and maintain a friendly tone.
-
Click the magnifying glass in any field to see the available choices.
-
-
-
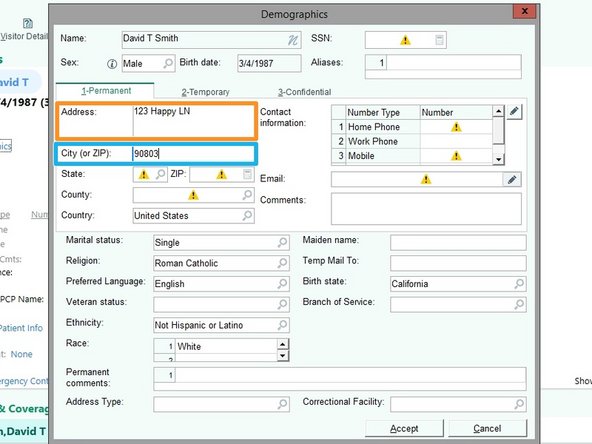
When entering the address, if there is an abbreviation, it must be used. CLICK HERE to view The United States Postal Service Abbreviations
-
Collect the patient's Address
-
Collect the patient's Zip Code
-
To auto populate the other address fields, enter the Zip Code in the "City(or Zip)" field.
-
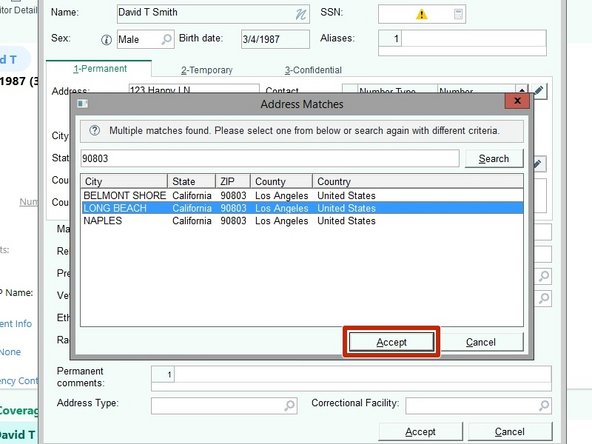
If the Zip Code applies to multiple cities, confirm the patient's specific city.
-
Click Accept
-
-
-
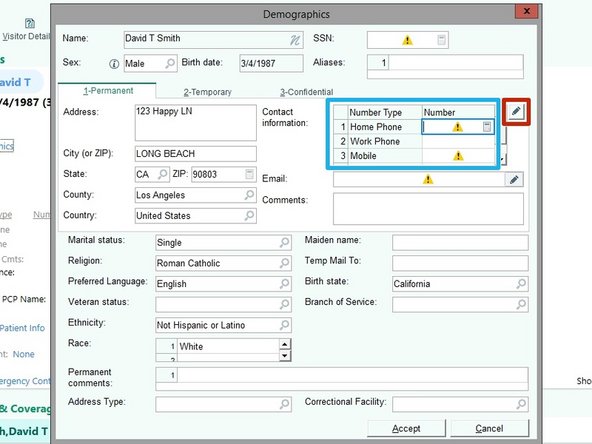
Collect the patient's Phone Number
-
Do not include any dashes in the phone number.
-
If the patient indicates they have two phone numbers, you will need to determine which is the primary / secondary
-
Click the Pencil icon to configure the phone number preferences
-
-
-
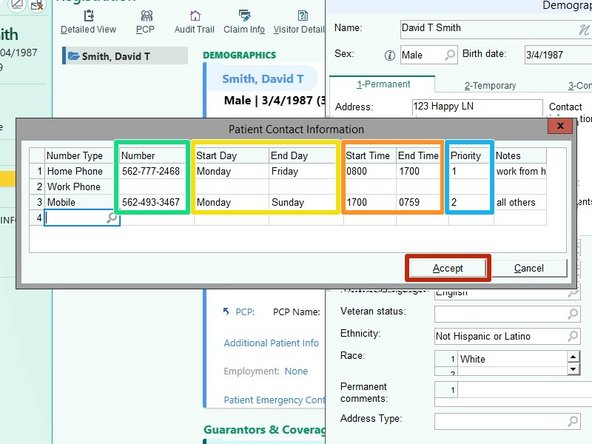
Collect the patient's Phone Numbers
-
If the patient indicates specific days or times to call, add those details.
-
Collect the Start and End Day
-
Collect the Start and End Time
-
Add AM or PM when entering the time, it will be added in Military Time.
-
Set the Priority
-
Add notes if any details need to be included.
-
Click Accept
-
-
-
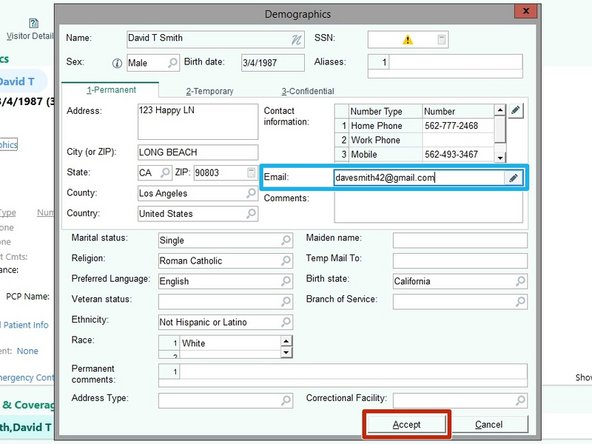
Collect the patient's Email
-
Click Accept
-
-
-
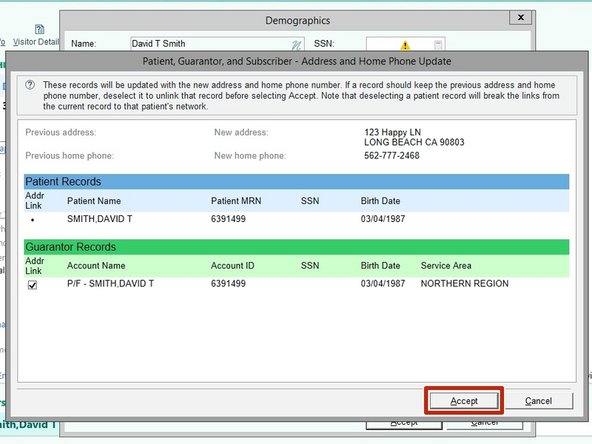
Click Accept
-
-
-
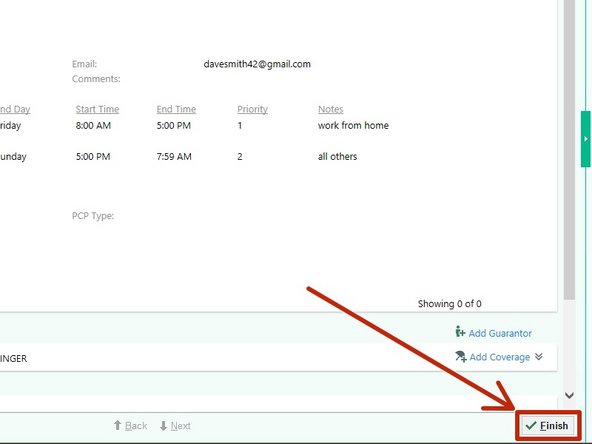
Click Finish
-
-


