Introduction
You must register with Geisinger before you can access their applications, and your working environment. This guide will take you through registering your account and setting up the PingID application on your smartphone.
-
-
-
Click Password Reset
-
-
-
Your Geisinger Email Address is provided to you in the Registering Geisinger Account email you received from your hiring manager.
-
Enter your Geisinger Email Address
-
Click Submit
-
-
-
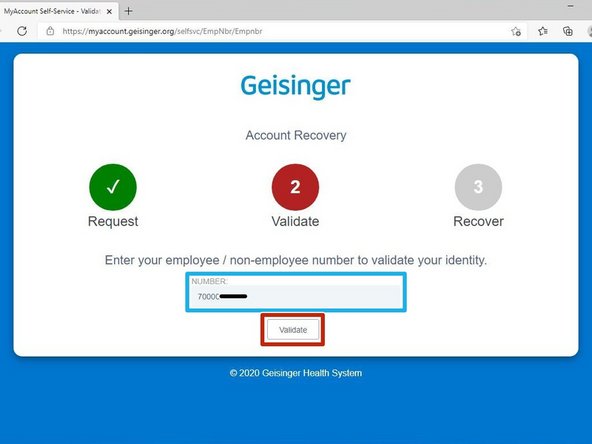
Your Employee / Non-Employee Number will be provided to you by your hiring manager and should be include in an email thread forwarded to you. It usually starts with 7000 - then 4 more numbers.
-
Enter your Employee / Non- Employee Number
-
Click Submit
-
If you do not know your Employee / non-Employee Number, ask your hiring manager.
-
-
-
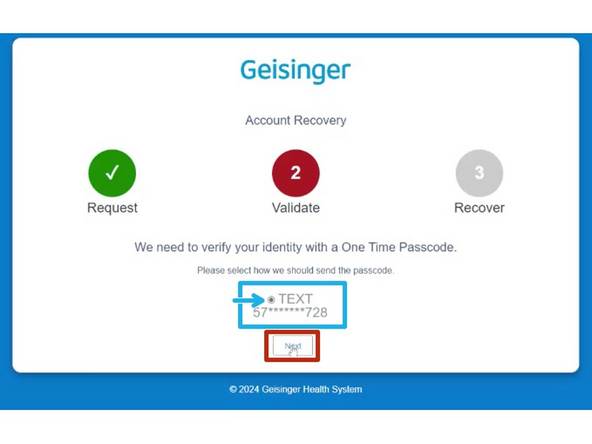
A One Time Passcode will be sent to your mobile phone.
-
Select Text
-
Click Next
-
-
-
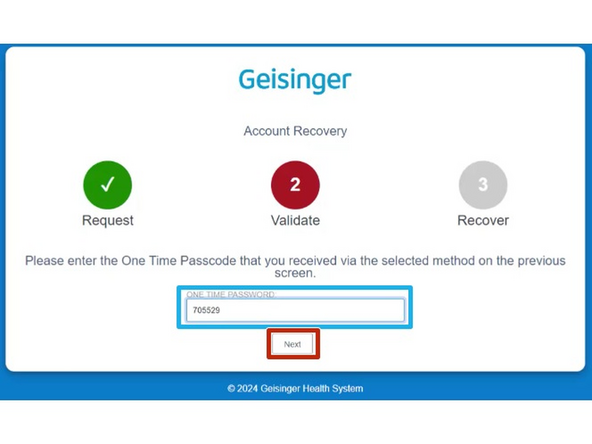
Enter the One Time Passcode
-
Click Next
-
-
-
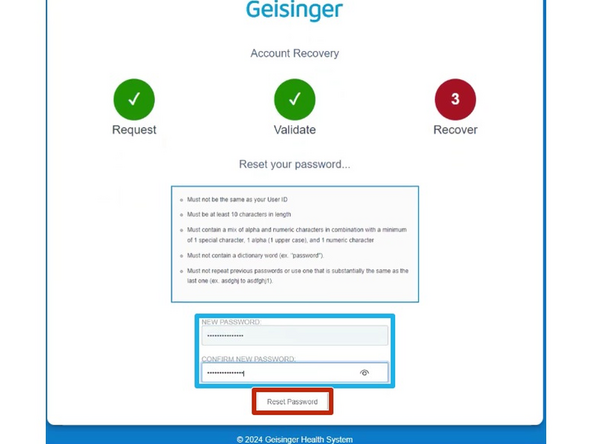
Be sure to make a note of your New Geisinger Password.
-
Enter your New Password
-
Click Reset Password
-
-
-
Enter your New Password and Confirm
-
Example: T2FlexForce!
-
Click Reset Password
-
You will need your password in Step 12.
-
-
-
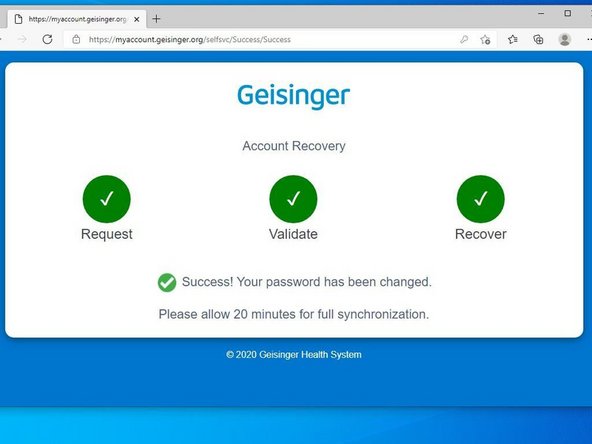
Once your password has been changed:
-
YOU DO NOT NEED TO WAIT 20 MINUTES.
-
Proceed to Step 9.
-
-
-
-
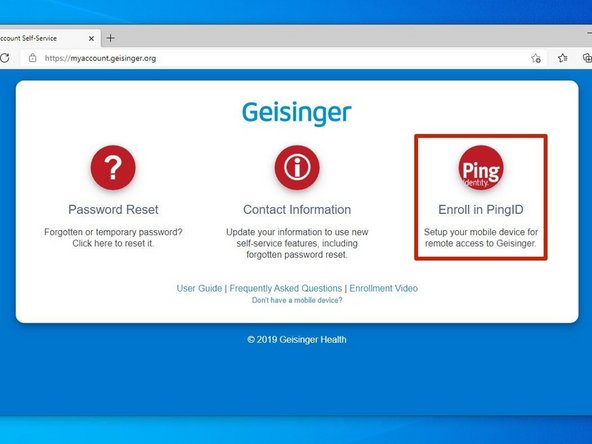
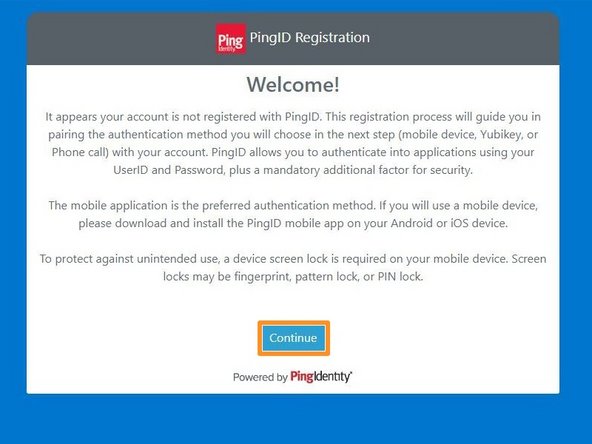
Click Enroll in PingID
-
-
-
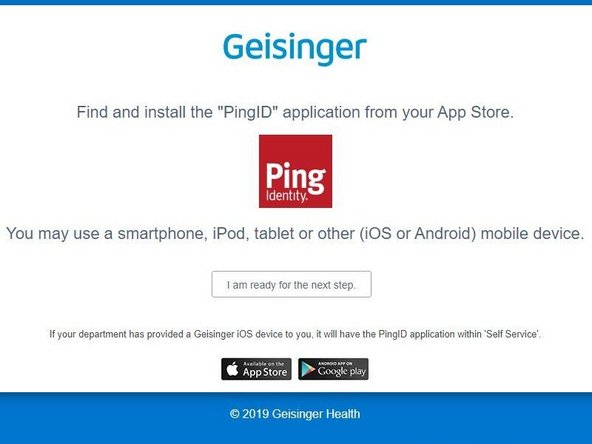
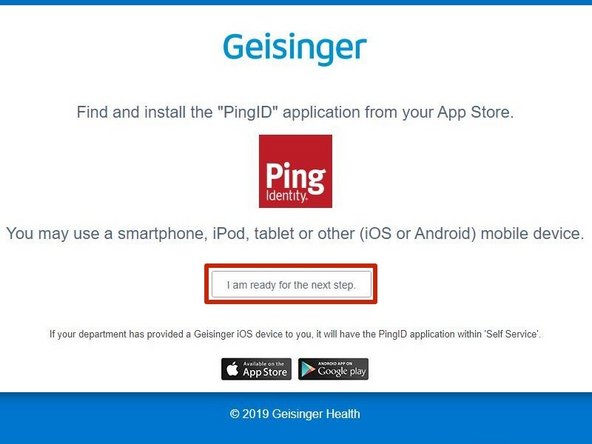
Find and install the PingID application from your App Store.
-
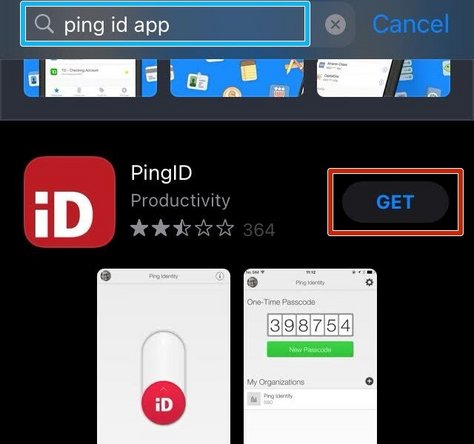
Search the app store for the Ping ID app
-
For iOS: Select Get
-
For Android: Select Install
-
-
-
Go back to your computer:
-
Click I am ready for the next step
-
-
-
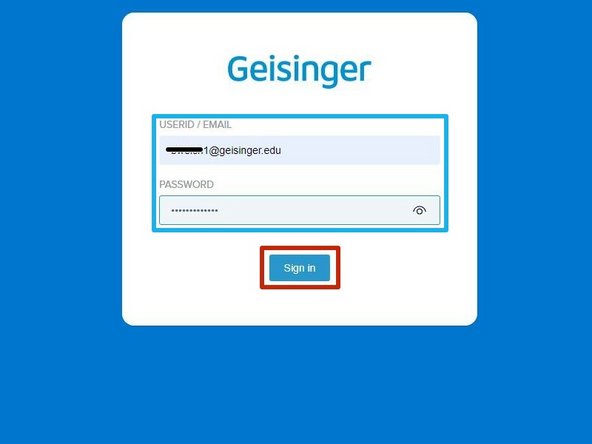
Enter your Geisinger Email and Password
-
Your password was configured in Step 7.
-
Click Sign In
-
-
-
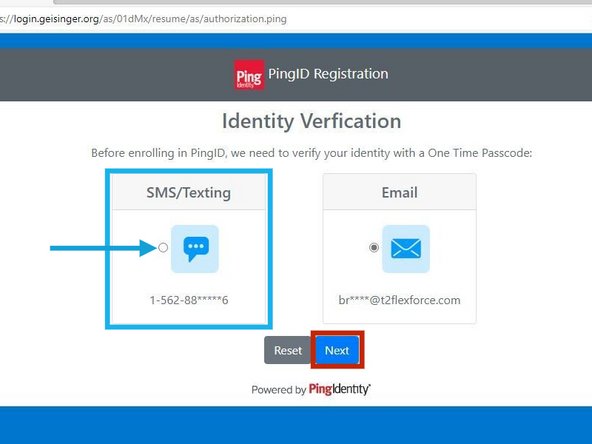
Select SMS/Texting
-
Select Next
-
-
-
Check your mobile device for a 6 digit code from PingID"
-
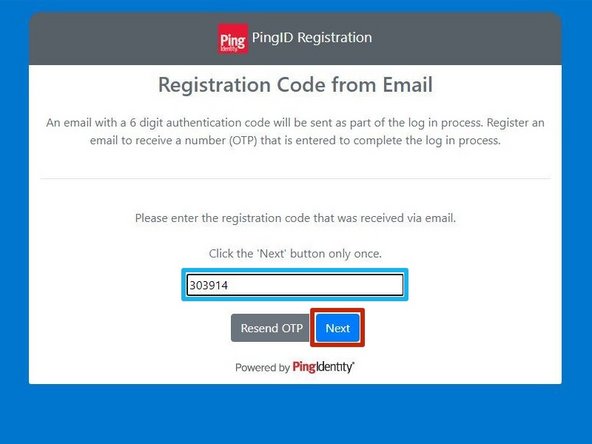
Enter the One-time Passcode
-
Click Next
-
-
-
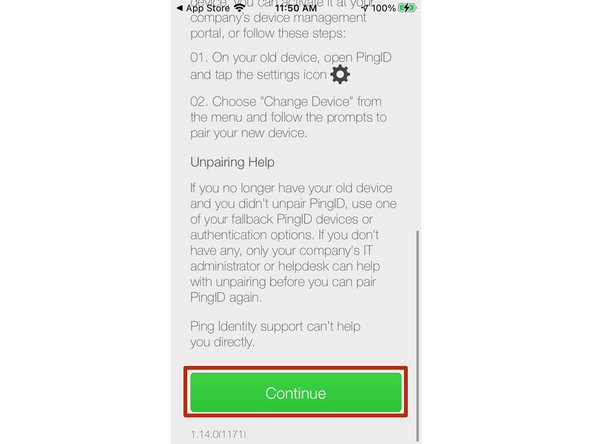
Select Continue
-
Select Mobile App
-
Select Next
-
-
-
Go back to your mobile device:
-
Open PingID
-
-
-
Accept the Terms of Service
-
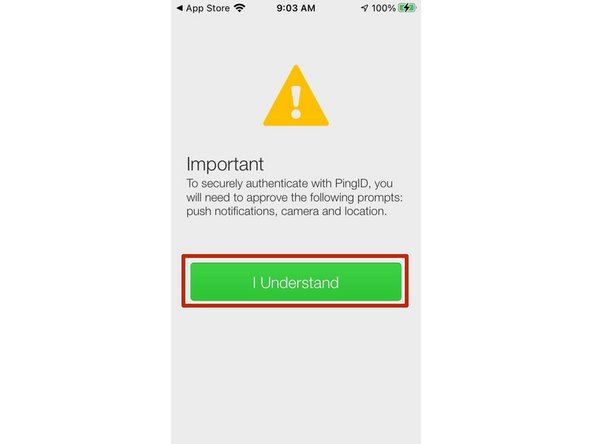
To securely authenticate with PingID, you will need to approve the following prompts: push notifications, camera and location.
-
Select I Understand
-
-
-
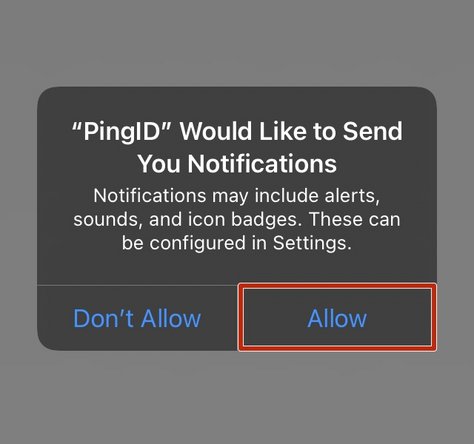
PingID needs permission to send notifications:
-
Select Allow
-
-
-
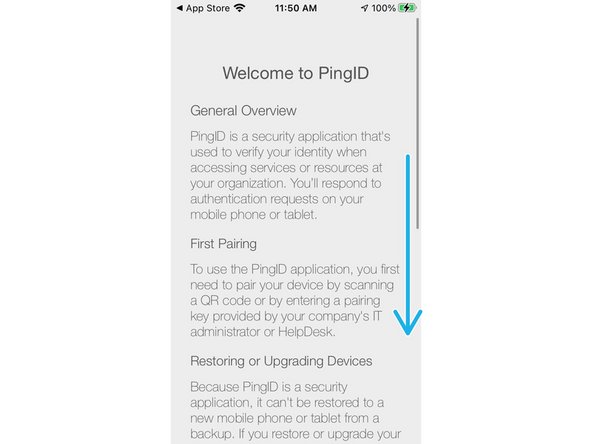
Read through the Welcome to PingID document:
-
Scroll through the document
-
Select Continue
-
-
-
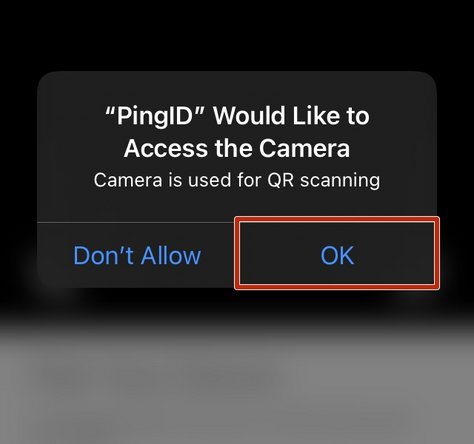
PingID will request permission to use your camera:
-
Select OK
-
-
-
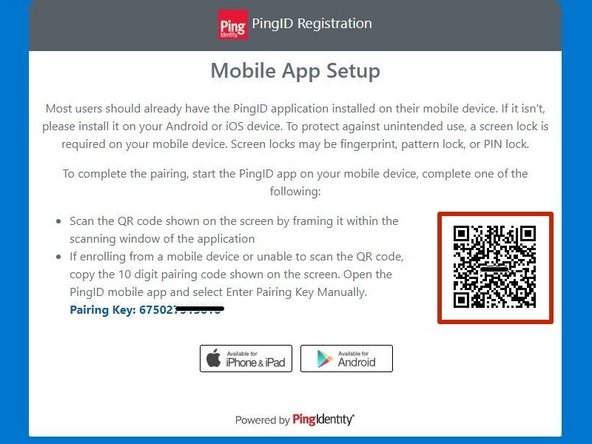
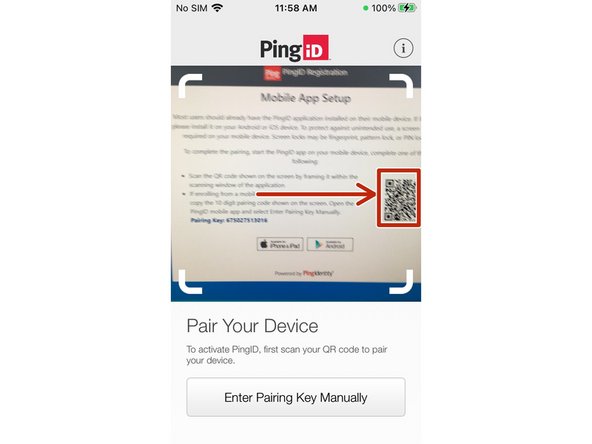
Scan the QR Code using the PingID app
-
-
-
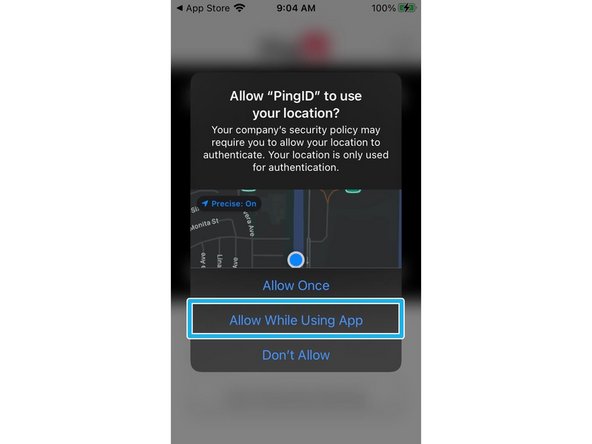
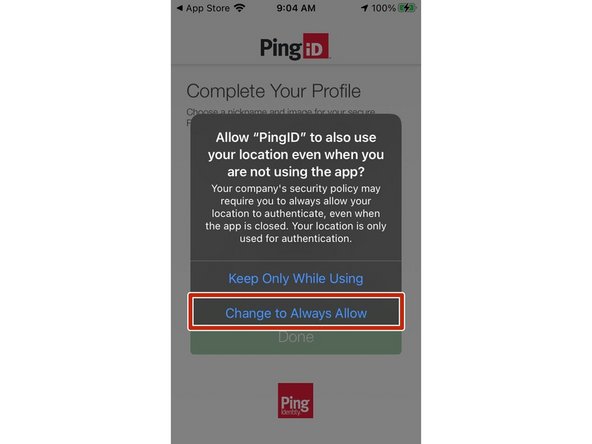
PingID requires access to your location when the app is in use:
-
Select Allow while Using App
-
Select Change to Always Allow
-
-
-
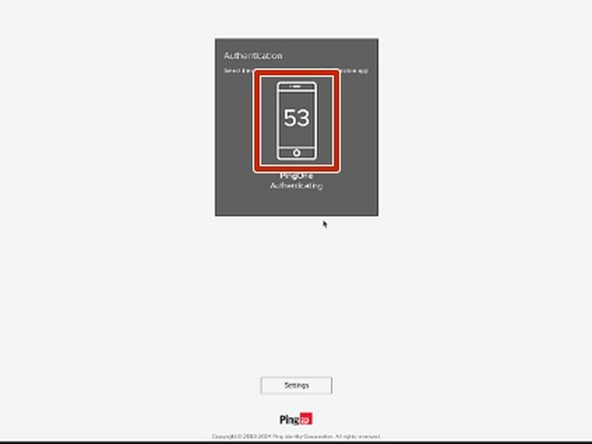
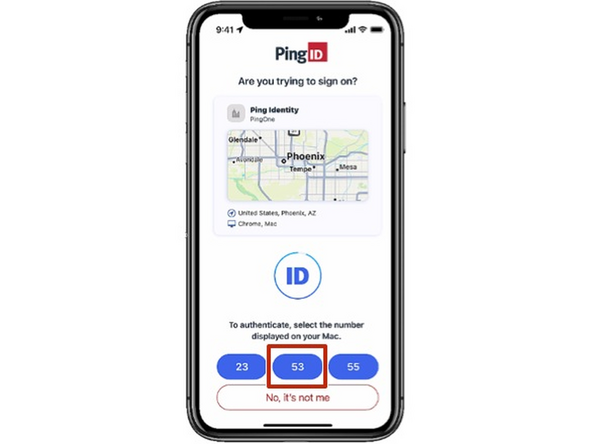
Your desktop will show a number for you to verify on your mobile device in the PingID app.
-
Select the Number displayed on your desktop
-
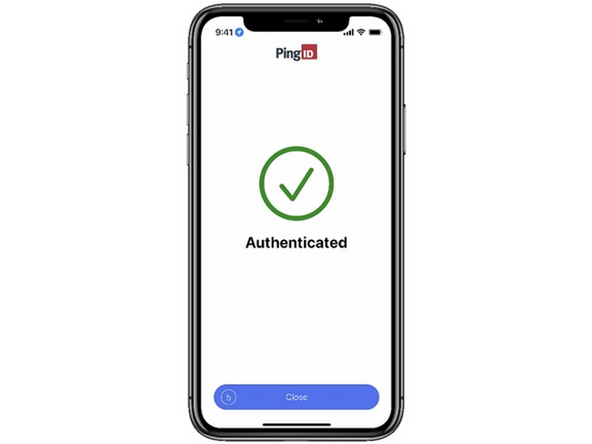
You will see an Authenticated message.
-
-
-
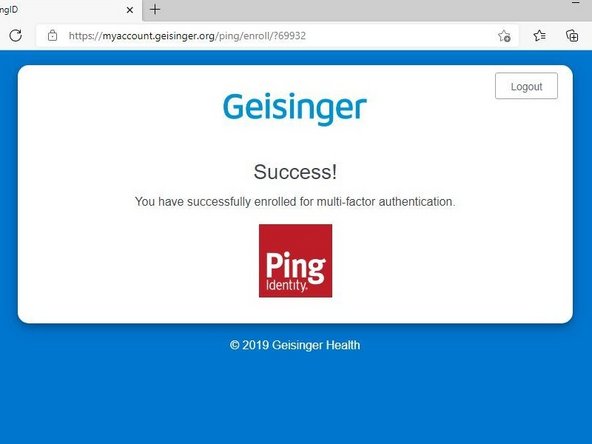
Your browser will say, Success! You have successfully enrolled for multi-factor authentication.
-