Introduction
This guide will describe and outline the best practices when looking up a patient and creating a new patient chart.
-
-
To search for a patient record:
-
Click Appts
-
-
-
HIPAA validation ensures that we are protecting patient PHI (Protected Health Information) and not accessing an incorrect chart creating a delay in care for the correct patient.
-
You must HIPAA validate the patient on the line. You must search the Full Name, Date of Birth and Sex prior to looking up and creating a new patient. Validating the customer information will ensure duplicate records are not created. HIPAA validators are:
-
REQUIRED Full name: lance, long
-
Date of Birth: 030487
-
Medical Record Number(MRN): 6391502
-
Last 4 of Social Security Number(SSN): *6694
-
Enter the HIPAA validators
-
Click Find Patient
-
-
-
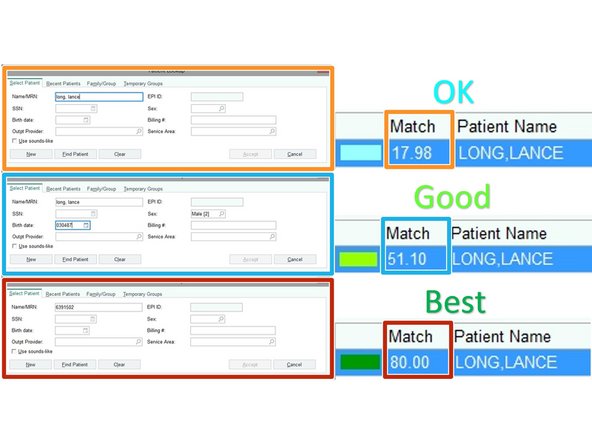
The more information you can include in the search the better. The MRN is the best way to verify a patients record.
-
Minimal Information will have OK Match probability
-
Detailed Information will have Good Match probability
-
The Medical Record Number (MRN) will have the Best Match probability
-
Patients may confuse their MRN with their Insurance ID.
-
For search and HIPAA validation purposes, always try to capture the Full Name and Date of Birth, then rely on the MRN and last 4 of the SSN as backups.
-
-
-
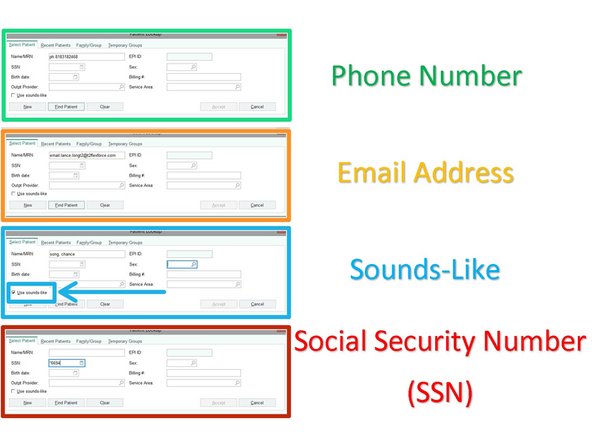
If the patient's chart does not display, you must search for the patient using the following alternative methods:
-
Ask the customer to spell their name
-
Ask about previous names (aka, maiden names, etc.)
-
Ask if they have been seen at any Carle facility, such as the ER.
-
Phone Number: ph.8183182468
-
E-Mail Address: email.lance.longt2@t2flexforce.com
-
Sounds-Like: song, chance
-
SSN: *6694
-
-
-
You must search the Full Name, Date of Birth and Sex prior to looking up and creating a new patient.
-
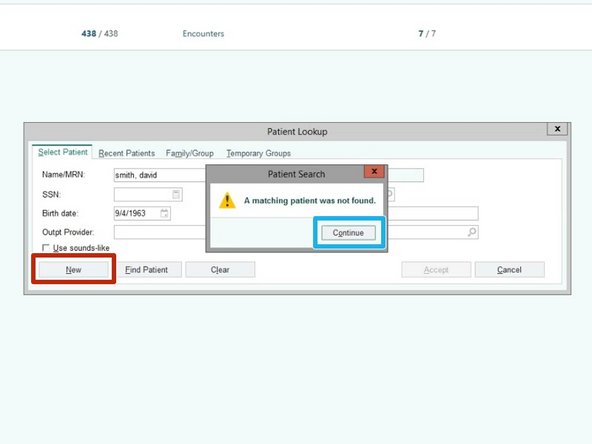
If no patient record exists:
-
Click Continue
-
Click New
-
-
-
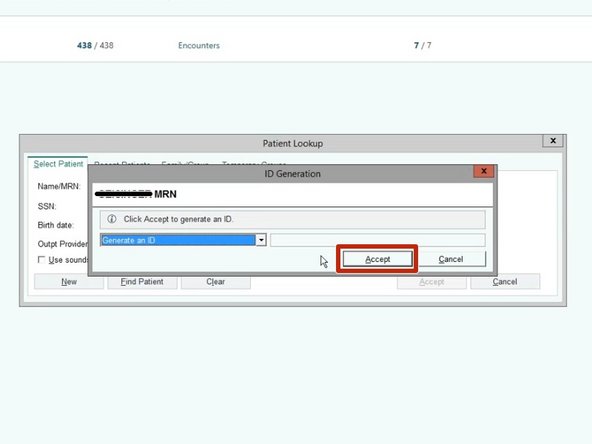
Click Accept
-
-
-
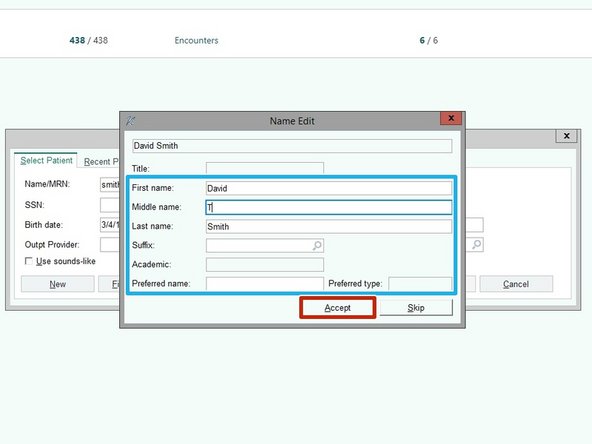
Confirm and add any Additional Name Details
-
Click Accept
-
-
-
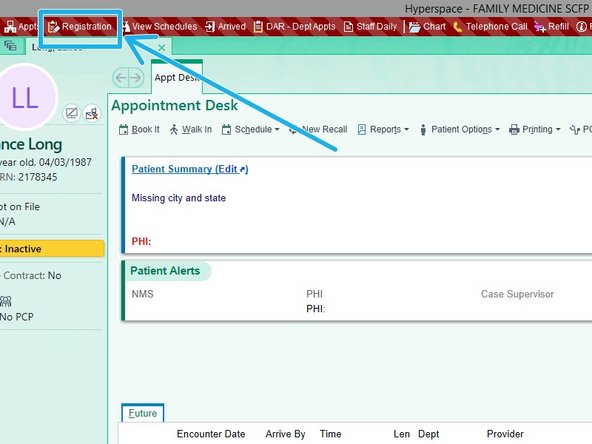
Click Registration
-
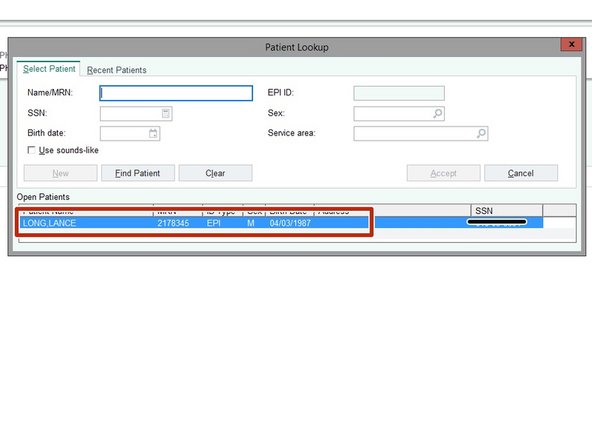
Double-click the Patient Name
-
-
-
Complete the rest of the Patient Demographics.
-
You must obtain as much patient information as you can.
-
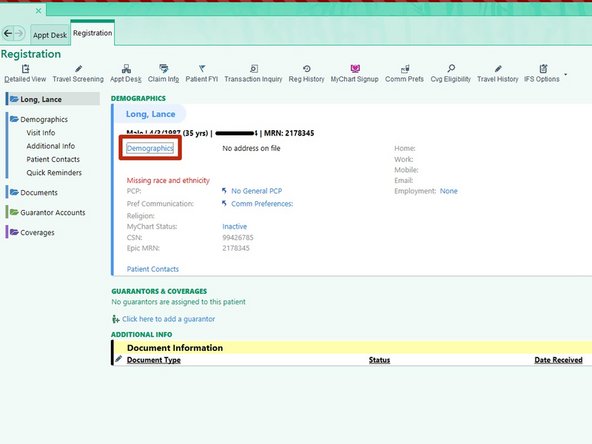
Click Demographics
-
-
-
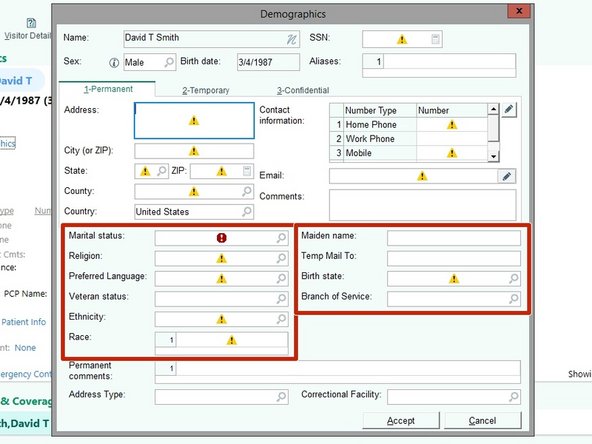
Demographics with a STOP SIGN are required before you can proceed. All others should be obtained if possible.
-
Collect the patient's Marital Status and other background demographics
-
To ensure you can obtain as many details as possible, remember to be courteous and maintain a friendly tone.
-
Click the magnifying glass in any field to see the available choices.
-
-
-
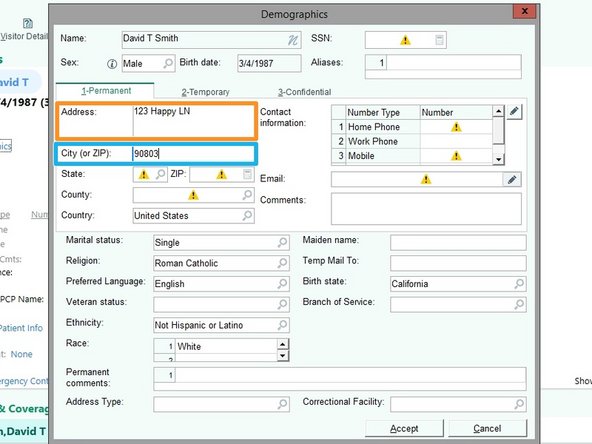
When entering the address, if there is an abbreviation, it must be used. CLICK HERE to view The United States Postal Service Abbreviations
-
Collect the patient's Address
-
Collect the patient's Zip Code
-
To auto populate the other address fields, enter the Zip Code in the "City(or Zip)" field.
-
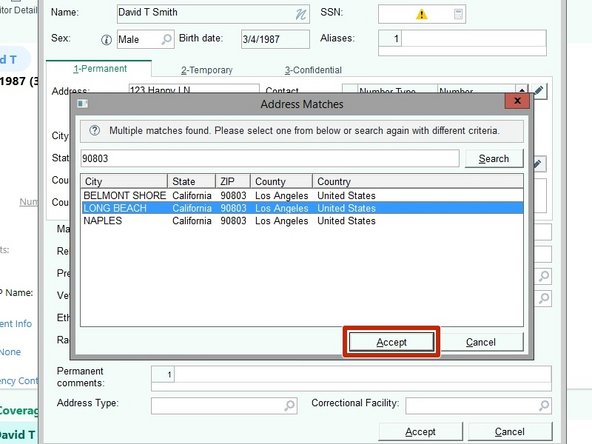
If the Zip Code applies to multiple cities, confirm the patient's specific city.
-
Click Accept
-
-
-
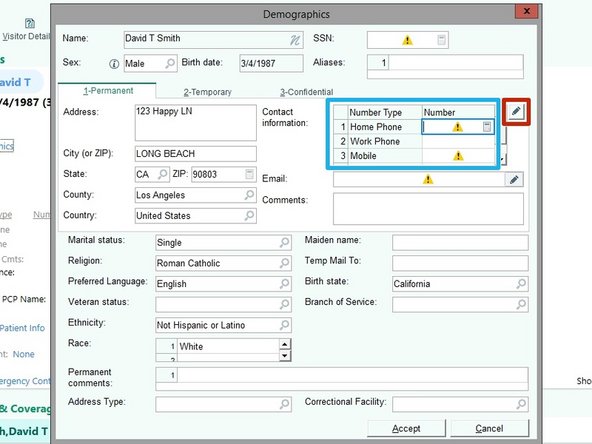
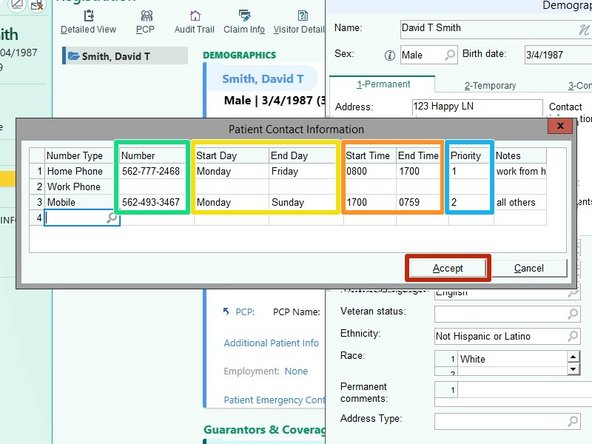
Collect the patient's Phone Number
-
Do not include any dashes in the phone number.
-
If the patient indicates they have two phone numbers, you will need to determine which is the primary / secondary
-
Click the Pencil icon to configure the phone number preferences
-
-
-
Collect the patient's Phone Numbers
-
If the patient indicates specific days or times to call, add those details.
-
Collect the Start and End Day
-
Collect the Start and End Time
-
Add AM or PM when entering the time, it will be added in Military Time.
-
Set the Priority
-
Add notes if any details need to be included.
-
Click Accept
-
-
-
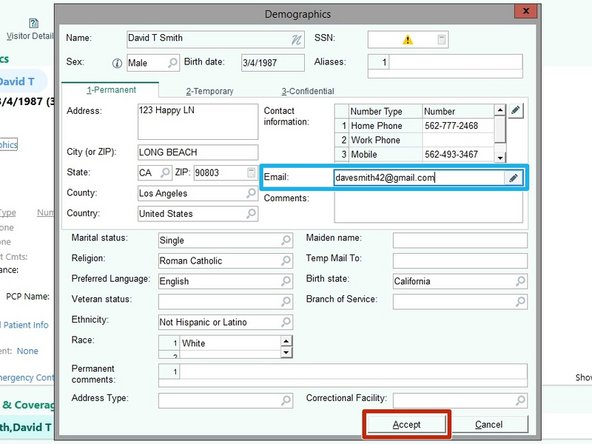
Collect the patient's Email
-
Click Accept
-
-


